eNodeB Configuration
Prerequisites
Make sure you follow the instructions in "Deploying Orchestrator" for successful installation of Orchestrator and the instructions in "AGW Configuration" to provision and configure your Access Gateway (AGW).
S1 interface
Connect your eNodeB to the eth1 interface of Magma gateway. Magma uses eth1
as the default S1 interface. If you have more than one eNodeB, use an L2
switch to connect all S1 interfaces. For debugging purposes, you may find it
particularly useful to do the following:
- Configure a managed L2 switch (e.g. this NETGEAR) to mirror port X and port Y to port Z.
- Connect port X of that switch to the
eth1interface on your AGW. - Connect the WAN interface on your enodeB to port Y on the switch.
- Connect your host to port Z on the switch.
This will allow you to do live packet captures with Wireshark from your host to debug the S1 interface between the enodeB and the AGW (filter for SCTP).
Automatic configuration
Magma officially supports auto-configuration of the following devices:
- Baicells Nova-243 Outdoor FDD/TDD eNodeB
- Firmware Version: BaiBS_RTS_3.1.6
- Firmware Version: BaiBS_RTSH_2.6.0.1
- Baicells mBS1100 LTE-TDD Base Station
- Firmware Version: BaiStation_V100R001C00B110SPC003
- Baicells Neutrino-244 ID FDD/TDD enodeB
Magma supports the following management protocols:
- TR-069 (CWMP)
Magma supports configuration of the following data models:
- TR-196 data model
- TR-181 data model
The Magma team plans to add support for more devices and management protocols.
To handle automatic configuration of eNodeB devices on your network, Magma
uses the enodebd service. The enodebd service is responsible for handling
the O&M interface between Magma and any connected eNodeB. The enodebd service
can be disabled if you configure your eNodeB devices manually.
Baicells
Use the enodeB's management interface to set the management server URL to
baiomc.cloudapp.net:48080. Magma uses DNS hijacking to point the eNodeB to
the configuration server being run by enodebd. baiomc.cloudapp.net:48080
will point to 192.88.99.142, the IP address that the TR-069 ACS is
being hosted on.
Provisioning Your eNodeB on NMS
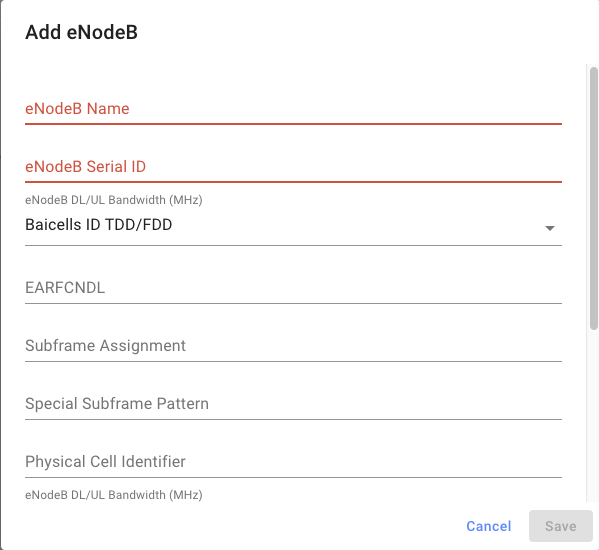
Get the serial number of your eNodeB, you'll need it to register the device. On the NMS, navigate to "eNodeB Devices" in the sidebar, and hit "Add EnodeB". Configure the RAN parameters as necessary. Note that fields left blank will be inherited from either the network or gateway LTE parameters:

Then, go back to the "Gateways" page and edit the LTE configuration of your AGW. Enter the serial number of the enodeB you just provisioned into the "Registered eNodeBs" field, then hit save.
Basic Troubleshooting
After connecting your eNodeB(s) to the gateway through the eth1 interface, you
may want to check a few things if auto-configuration is not working.
Magma will be running a DHCP server to assign an IP address to your connected
eNodeB. Check if an IP address gets assigned to your eNodeB by either checking
the eNodeB UI or monitoring the dnsd service.
journalctl -u magma@dnsd -f
# Check for a similar log
# DHCPDISCOVER(eth1) 48:bf:74:07:68:ee
# DHCPOFFER(eth1) 10.0.2.246 48:bf:74:07:68:ee
# DHCPREQUEST(eth1) 10.0.2.246 48:bf:74:07:68:ee
# DHCPACK(eth1) 10.0.2.246 48:bf:74:07:68:ee
Use the enodebd_cli.py tool to check basic status of eNodeB(s). It also allows
for querying the value of parameters, setting them, and sending reboot requests
to the eNodeB. The following example gets the status of all connected eNodeBs.
enodebd_cli.py get_all_status
# --- eNodeB Serial: 120200002618AGP0001 ---
# IP Address..................10.0.2.246
# eNodeB connected.....................1
# eNodeB Configured....................1
# Opstate Enabled......................1
# RF TX on.............................1
# RF TX desired........................1
# GPS Connected........................0
# PTP Connected........................0
# MME Connected........................1
# GPS Longitude...............113.902069
# GPS Latitude.................22.932018
# FSM State...............Completed provisioning eNB. Awaiting new Inform.
It may take time for the eNodeB to start transmitting because enodebd will
reboot the eNodeB to apply new configurations. Monitor the progress of enodebd
using the following command
journalctl -u magma@enodebd -f
# Check for a similar log
# INFO:root:Successfully configured CPE parameters!
Manual configuration
Manual configuration of connected eNodeB(s) is always possible. Magma was tested
with multiple Airspan eNodeB models configured through NetSpan management
software.
When manually configuring eNodeBs, make sure the eNodeB configuration matches
that of the Magma cellular configuration. Pay special attention to the
configuration of PLMN, EARFCN and TAC.
Basic Troubleshooting
When manually configuring your eNodeB, you can use the manufacturers tools or interfaces to monitor and troubleshoot the eNodeB configuration.
You can also listen to the S1 interface traffic and validate a proper S1
setup and handshake. Below are the SCTP packets exchanged between the eNodeB
and MME.
Source        Destination    Protocol  Length   Info
10.0.2.246    10.0.2.1       SCTP      66       INIT
10.0.2.1      10.0.2.246     SCTP      298      INIT_ACK
10.0.2.246    10.0.2.1       SCTP      278      COOKIE_ECHO
10.0.2.1      10.0.2.246     SCTP      60       COOKIE_ACK
10.0.2.246    10.0.2.1       S1AP      106      S1SetupRequest
10.0.2.1      10.0.2.246     SCTP      62       SACK
10.0.2.1      10.0.2.246     S1AP      90       S1SetupResponse
10.0.2.246    10.0.2.1       SCTP      62       SACK
10.0.2.246    10.0.2.1       SCTP      66       HEARTBEAT
10.0.2.1      10.0.2.246     SCTP      66       HEARTBEAT_ACK
Connecting your first user
Adding subscribers
Once your eNodeB starts transmitting, UEs may attempt to attach to your network. Your AGW will reject these attach requests due to authentication failure until you add the corresponding IMSI to the subscriber database.
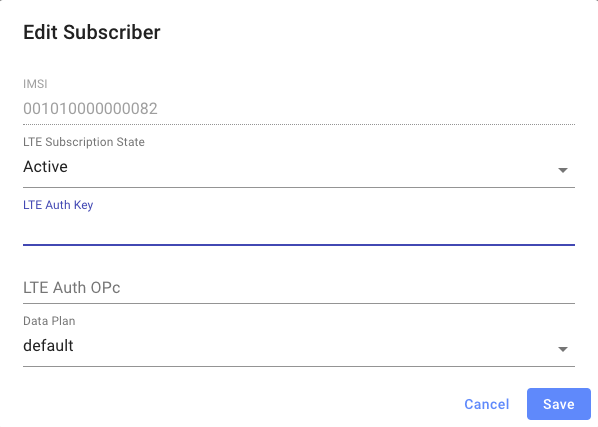
On the NMS, go to "Subscribers", then "Add Subscriber". The SIM secrets can be entered either in hex or base64-encoded binary:

Subscriber information will eventually propagate to the AGW. You can verify
using the CLI command "subscriber_cli.py list"
Validating UE connectivity
Validating UE connectivity can be done from the UE side, MME side, or by
listening to traffic on the S1 interface.
Below is a typical UE attach procedure as captured on the S1 interface.
Source        Destination   Protocol        Info
10.0.2.246    10.0.2.1      S1AP/NAS-EPS    InitialUEMessage, Attach request, PDN connectivity request
10.0.2.1      10.0.2.246    S1AP/NAS-EPS    DownlinkNASTransport, Identity request
10.0.2.246    10.0.2.1      S1AP/NAS-EPS    UplinkNASTransport, Identity response
10.0.2.1      10.0.2.246    S1AP/NAS-EPS    DownlinkNASTransport, Authentication request
10.0.2.246    10.0.2.1      S1AP/NAS-EPS    UplinkNASTransport, Authentication response
10.0.2.1      10.0.2.246    S1AP/NAS-EPS    DownlinkNASTransport, Security mode command
10.0.2.246    10.0.2.1      S1AP/NAS-EPS    UplinkNASTransport, Security mode complete
10.0.2.1      10.0.2.246    S1AP/NAS-EPS    DownlinkNASTransport, ESM information request
10.0.2.246    10.0.2.1      S1AP/NAS-EPS    UplinkNASTransport, ESM information response
10.0.2.1      10.0.2.246    S1AP/NAS-EPS    InitialContextSetupRequest, Attach accept, Activate default EPS bearer context request
10.0.2.246    10.0.2.1      S1AP            UECapabilityInfoIndication, UECapabilityInformation
10.0.2.246    10.0.2.1      S1AP            InitialContextSetupResponse
10.0.2.246    10.0.2.1      S1AP/NAS-EPS    UplinkNASTransport, Attach complete, Activate default EPS bearer context accept
10.0.2.1      10.0.2.246    S1AP/NAS-EPS    DownlinkNASTransport, EMM information
